
Our Tentipi tent kåta
Updated February 12 2009
home![]() Our Tentipi tent kåta
Our Tentipi tent kåta
|
Our Tentipi tent kåtaUpdated February 12 2009 home |
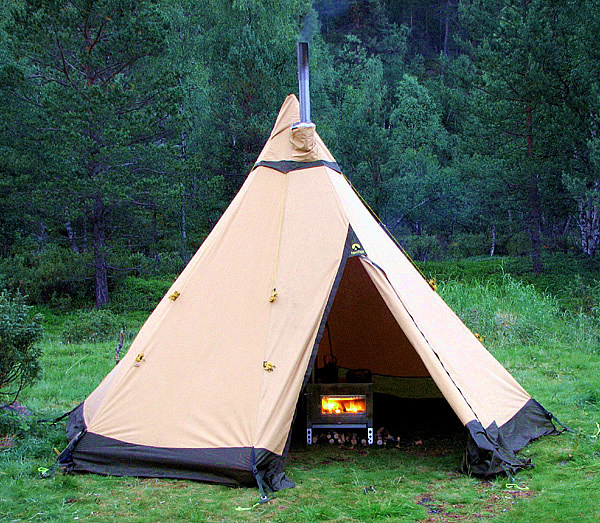
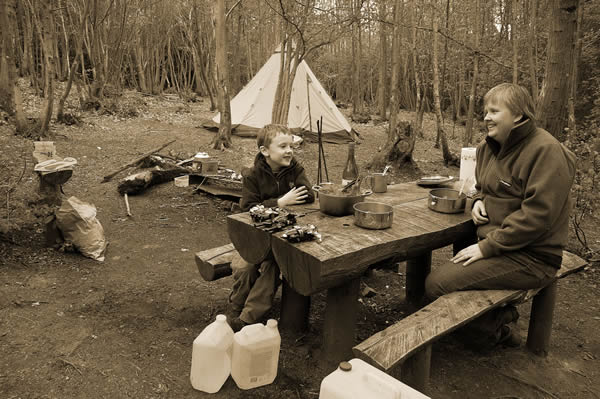
If you are going to live the dream, it helps to have the right accommodation (photo: www.fibistyle.ch)
We think the Tentipi Safir (formerly 'Varrie') 7 cp tent kåta is superior to the tents we've used previously.
The tentipi is very spacious inside (it should sleep seven adults shoulder-to-shoulder) and it feels beautifully designed and made; lots of attention to small details, as the sales brochure from the manufacturer demonstrates. And although the version in the photo above weighs 10.6 kilos in cotton/polyester canvas, it rolls up into a nice neat rucksack-sized bundle for the BoB trailer on my bike. For three-season use, the lightweight version (the Tentipi Kvarts 7, formerly 'Vaggie 7') fits in one pannier and weighs about six kilos with inner tent for luxurious solo trips. And yes, that's a woodburning stove in there.
We discovered these tents during our cycle tour along the Kystriksveien; the family next to us at Follingstua Camping were sleeping in one, which they described to me as a lavvo or lavvu tent, although this description is inaccurate since these tents have a single pole, unlike the Sami lavvo.
This Swedish tent design is available from British resellers Stunning Tents or from Nordic Outdoor. We bought from Caspar Odqvist at Nordic Outdoor, because he was extremely helpful and kind - I've since met Jon and Suzanne Parr at Stunning Tents and bought our second tentipi tent from them. Jon is equally helpful and enthusiastic (also turns out to be an ex-IT bod who worked for Admiral before the merger with CMG and then Logica all got too much!).
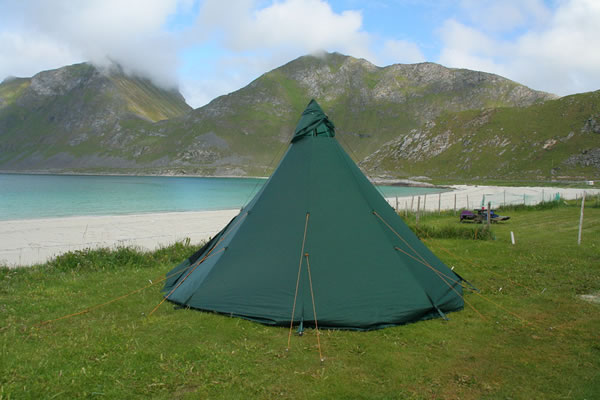
Lightweight tentipi fits in a pannier - Vikspollen, Lofoten Islands, 2008
First impressions on arrival of the tent were immediately favourable. The instructions are clear and the tent is very easy to erect. The shape is formed of eight triangular panels. One panel has a diagonal zip in it for the door, with a separate zip for the mosquito-proof door screen behind it. Each panel intersection point at the bottom is held to the ground by a peg - eight pegs around the periphery before storm guys are added.
A cloth square is supplied in the peg bag with a length of cord, the latter having a loop at one end and a pen mark near the end of other at the length of the radius of the tent. The cloth square is used as a guide to peg placement, being marked with a set of radiating lines at 45° to each other. It has a slot in the middle for a central marker peg - once pegged down, it acts as a quick guide for setting out the eight stakes that hold the base of the tent to the ground. The full length of the cord indicates the length to cut a replacement pole to if yours gets lost or broken. The cord also has a pen-mark some way from the end which indicates where to hold the outer end when sticking pegs into the ground. Once the pegs are in their initial positions at each point of the compass rose indicated by the cloth square, the ground straps around the skirt of the tent are slipped over the stakes, then the articulated aluminium central pole is pushed up in the middle of the tent to complete the task of putting it up.
How big is each model of tent? Several people have asked me this after failing to get a clear picture from the sales material provided by their reseller. The best way to judge the dimensions is to re-read the previous paragraph, and then measure off a length of cord or string according to these dimensions:-
Peg one end of the string to the ground and then holding the other end at the mark, run around the peg in a circle to get a good picture of the space available at ground level. Then climb a ladder or tree while holding the very end to get an idea of the height available, and wonder to yourself whether you would mind making yourself that conspicuous in your camping spot with a Varrie 9.
I don't have the dimensions for the even larger Topas (formerly Gaise) tent - the figures above have come from the instruction manuals for erecting our Safir 7, which were written before the Topas was in production.
An inner tent is available, but according to Caspar would be overkill most of the time in the mild UK climate. We bought a Comfort inner tent to keep out midges on our 2007 tour. This is made of conventional gold-coloured ripstop polyester tent material and mosquito netting, and it attaches with toggles to the top (and mid-way-down storm guying points) of the Varrie outer. Note that the cheaper outer tents (I'm thinking of the Vagge) don't have the mid-way-down attachment points, so you'll have to sew these in yourself if you need them. Using an inner tent removes the need to buy a separate groundsheet, although the inner tent tray material is of a lighter weight than that of the separate groundsheets themselves (it is comparable with that used on North Face or Wild Country tent floors).
Otherwise there's a choice of two weights of stand-alone groundsheet which fix onto the outer tent. Both are designed with zips radiating from the middle which can be undone to fold back the material so as allow a fire to be built inside the tent (you can see this in the photo below). Although we decided to start with our own groundsheet and graduate to something more sophisticated later on, I went to meet John Parr at Stunning Tents a week or two later to pick up a "Comfort" groundsheet. This attaches to the outer tent at the pegging points with toggles, and is tensioned (to get it taut) by pulling on the second small strap attached to the larger strap found at each pegging point. Each of these smaller straps runs through an additional buckle and groundsheet connector inside the tent, so that the groundsheet can be tensioned separately to the flysheet.
There are extra storm guys at the edge of each panel - 16 in total, two per edge one-third and two-thirds of the way down the side. They are tucked away in elasticated loops for use when required, should you need to stiffen the symmetry in very windy weather.
The tent has a sophisticated system of vents at the top and along the bottom. The wind panels of a traditional tipi are replaced by a conical section of material at the top of the tent which rises on tapes when shock-cords are pulled - the cords are gathered together and run down a sleeve stitched to the inside of the outer tent. There is a separate rain hat above this moving top cone - typically you'd see the night sky through the top of the tent, but the rain hat can be used to shut out any squalls if required. All of the vents are covered with mosquito netting bar a velcro panel in the top cone which the stove pipe pokes out of, if used.
So what is it like to use? Well, it's a delight! Being a traditionalist, I put it up for the first time in the dead of night by the light of a single-LED torch on September 1st in the Surrey Hills, tucked away in a secret spot. I used the small firebox with lumpwood charcoal and two firelighters to get a fire going, and the tent warmed up very rapidly. The smoke rose straight out of the fireplace and went up through the hole in the roof, giving me a small circle of stars to look at - I was hooked!
We put up the tent the following Friday night at Tanners Hatch Youth Hostel, and this time brought the firebox inside after using it to cook our evening meal. I put some tin foil down under the suspended box to catch any ash fall, and the ground was fine the next morning. We found that cooking the evening meal over charcoal in Le Creuset iron cookware was fine; it doesn't leave soot on the pots and the heat from the fire is reasonably easy to control by moving coals around with a stick. Next time I'd bring a piece of copper pipe with one end hammered flat to blow through to get the fire going (or to use as a rake to move the coals around). Thick gardening gloves are essential for lifting the cooking gear back off the fire! The MSR stove was useful to get food started while the fire was getting to the "grey coals" stage.
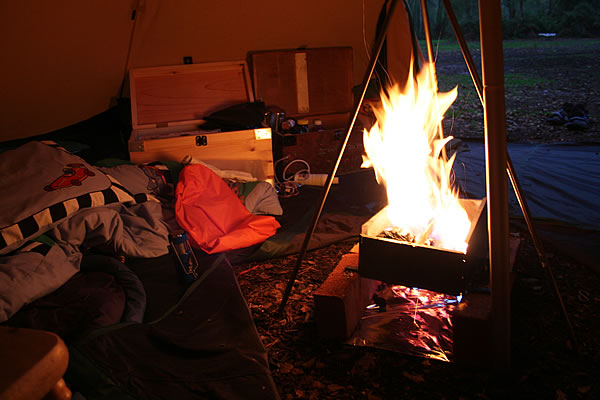
Early evening, 13/10/06 - Safir (Varrie) 7, groundsheet zipped open and turned back under the fire
Friday night, Wellington Country Park, 13/10/06
Saturday night, Wilderness Wood, 28/04/07
Since the first trip I've often cooked over the firebox using a tripod made from steel tubes. This is used with a chain and an S-hook for dangling big heavy pots over the fire. The chain is used to suspend a hanging trivet for holding the cast iron cookware at the correct height for making chappatis without burning them. You may be able to spot the trivet under the heavy frying pan in the picture below, where we are making bread in the vintage (1918!) Wonder Oven over a small firebox.
The other improvement we've made here is swapping out the folding Tentipi firebox (which distorts in the heat and is rusting out) for a collapsible Liard firebox made from stainless steel. The latter keeps its shape far better, and is strong enough to support a full Le Creuset casserole pot - it is heavy though at 1548g in its carrying case, and it is only about two-thirds the length of a shoe box. You can maybe see it sitting beside the fireplace with the Trangia kettle on top, in the black and white photo above. If you are looking for lighter fireboxes, the Swiss company Fibistyle seem to make quite a variety.
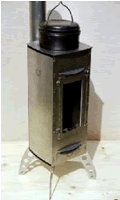
The ultimate winter accessory is a proper stove for the tent, particularly if the nylon inner tent is in use, since this is much less flame resistant than the canvas outer tent. The one I use now is the Titanium Goat stove which is sold in the US. The huge benefit is that it is very light (300g) and fits in a daypack, with the chimney. Here's a review of the stove I made last year:
My favourite stove prior to last year based on brochureware was the Fibistyle Zelt-Ofen but I haven't tried one yet. Here's the smaller of the two models available (the larger one is in the picture at the top of this page).
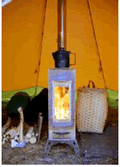
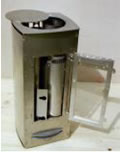
The Fibistyle Zelt-Ofen
Bushcraft expert Andrew Rush has suggested several other alternatives to me:
There may be more choice in Europe, I'd be interested to hear from you if you've tried any of the above or similar stoves from other manufacturers.
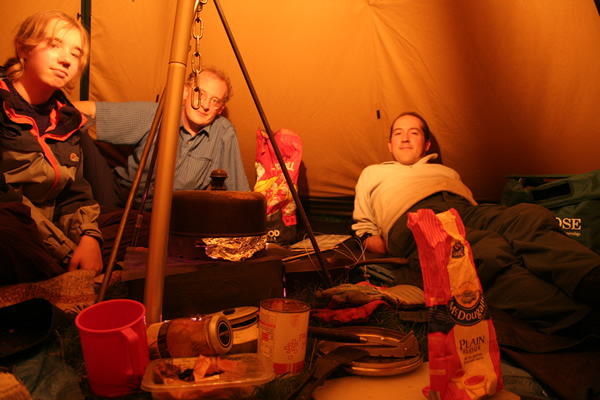
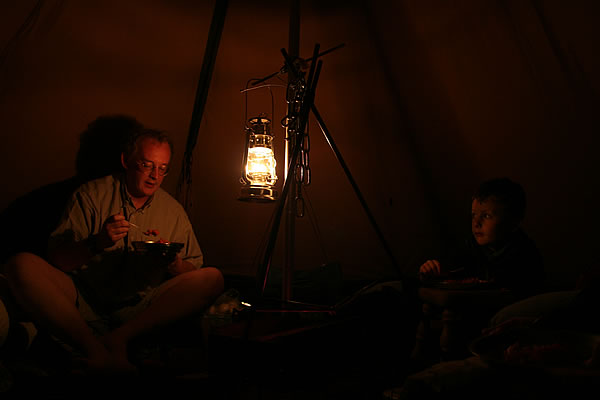
Kate, Jerry, Nick - 11:30 pm, Saturday 31/09/06
Mouse over the image to find six hotspots!
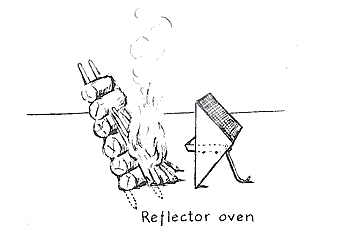
I'm now looking out for a large, oblong tin can to be snipped into half. The result should be the basis for the reflector oven shown below, which will have a shelf for baking on, as per this illustration from Reginald and Gladys Laubin's excellent book, The Indian Tipi:-
Notes on what to pack (mostly as a memory jogger) are on the "in the tent" page.
Found this interesting? Have a look at the cycling pages! Notes on using the tentipi on my three-month back-country cycle tour of Scandinavia are here.
![]()
home![]() tentipi
tentipi
[ Home | Strictly Business | Near Misses | Cycletouring ]